For the TotK Tadarok shrine, this page includes guidelines for finding and entering the shrine, a walkthrough of the shrine, answers to puzzles, and locations of hidden treasure chests.
Location of the Tadarok Shrine
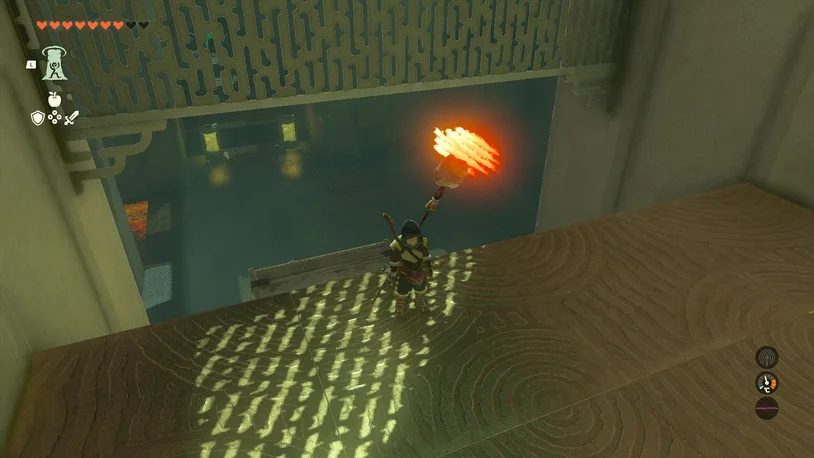
You’ll need to locate a cave beneath Mount Hylia to reach this shrine. The waterfall at the beginning of the River of the Dead serves as its entrance. A Blupee should be visible if you approach the area from the Temple of Time Ruins; just to the west of the waterfall. To avoid attackers and avoid having to cross the water, we advise hiking up to the east side of the waterfall and gliding over. Soon after you first saw the Blupee, it will vanish if you continue to follow it. You’ll learn that you’ve found the River of the Dead Waterfall Cave if you continue along the route behind the waterfall.
Look up once you’ve gotten the message. A Bubbulfrog should be hidden among the stalactites, as you can see. Use an arrow to bring it down.
As you advance further into the cave, a plain Like Like will appear to be blocking your way. It can be made to demonstrate its frailty with the help of electricity. When its tongue is exposed, shoot it with an arrow and attack it mercilessly. Continue until it falls, but take caution not to approach it too closely if it is not shocked. The shrine lies just beyond.
Guide to the puzzles in Tadarok Shrine
You will come across a lethal pool as soon as you enter the Tadarok shrine, where two electrical gadgets are pumping electricity into the water on chains. Use Ultrahand, which you may equip from the L menu, to lift the spheres out of the water and place them on the distant surface.
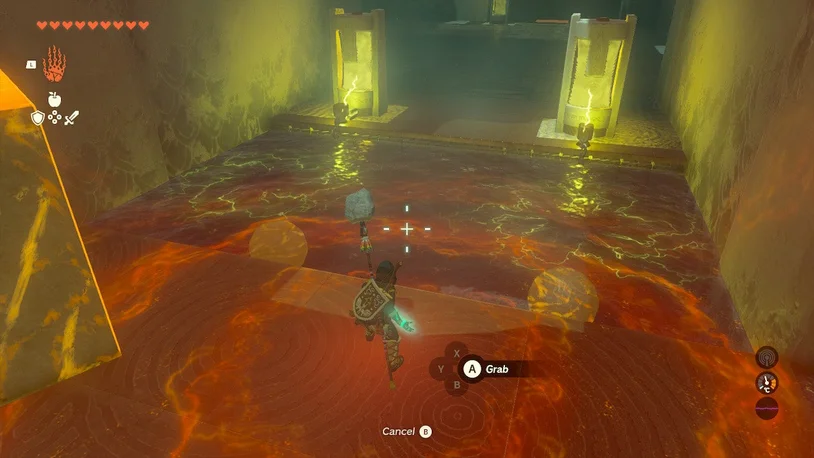
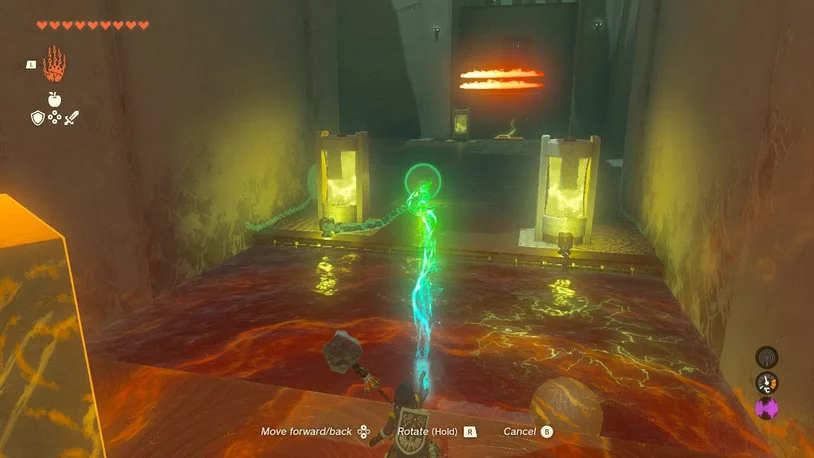
This will make the water safe to cross. Before doing so, pass the stone cube from the entrance room across the water.


Where is the treasure chest?
There is a treasure chest in the chamber to your left. Look to your left and you will see an ice cube being continuously dropped into three flames and melting there. To safeguard the ice cube, place the stone cube in front of the flames.
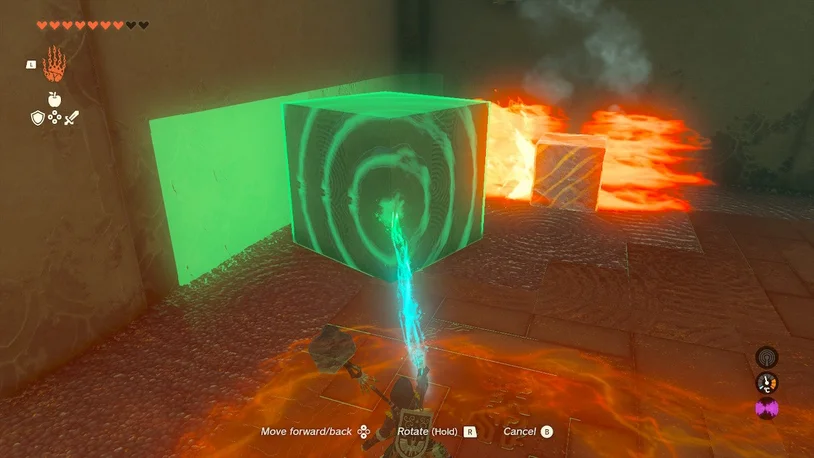
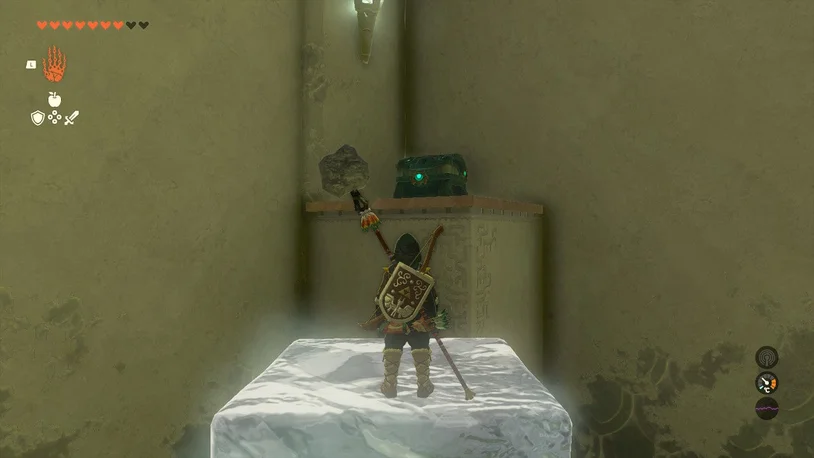
If the ice cube shrinks, let it be destroyed so that it drops a brand-new, fully-formed one because you want it to remain its original size. To get your Mighty Zonaite Shield, move the ice cube with Ultra Hand to the chest and climb it.
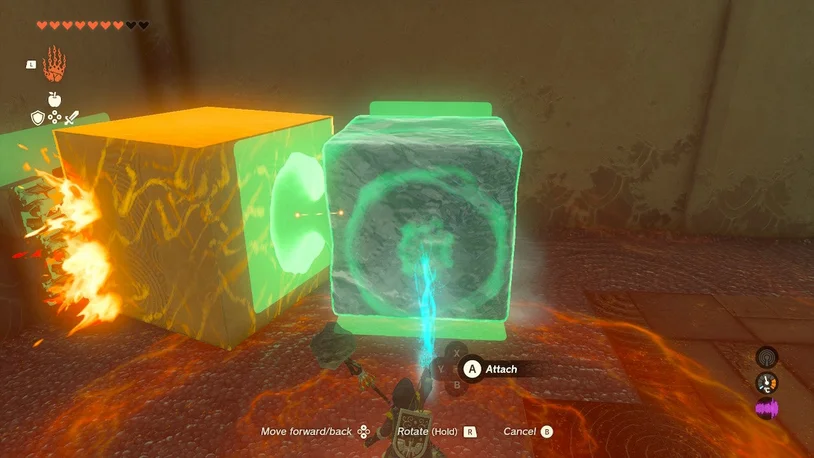
Find a lava pool and another electric swimming hole now. To make the sphere safe, take it out of the electrified pool. The second stone cube in this pool needs to be removed.
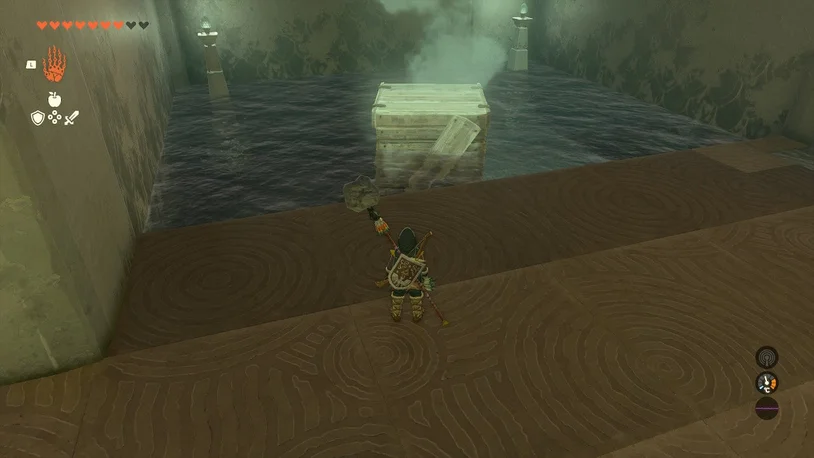
Move the two stone cubes—the one from the entrance room and the one from the pool—into the lava pool with your Ultra Hand to make a way across.
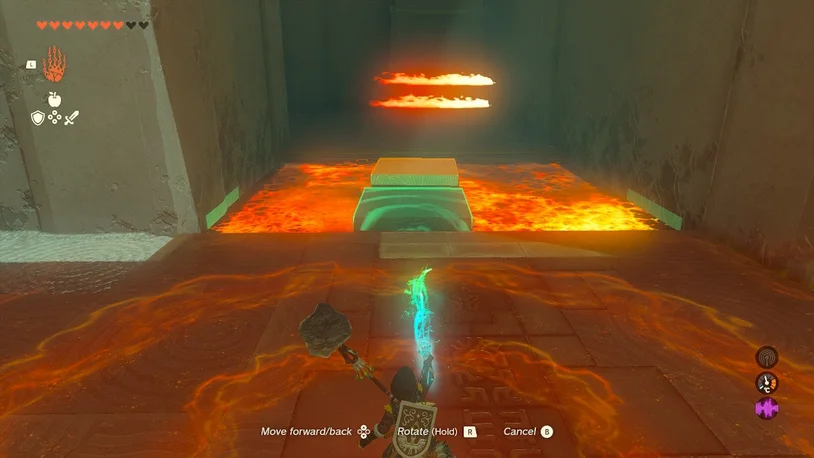
Here, using Ultrahand, you can prevent the wood box from being burned as soon as it falls and preserve it by dousing it in the neighbouring pool.
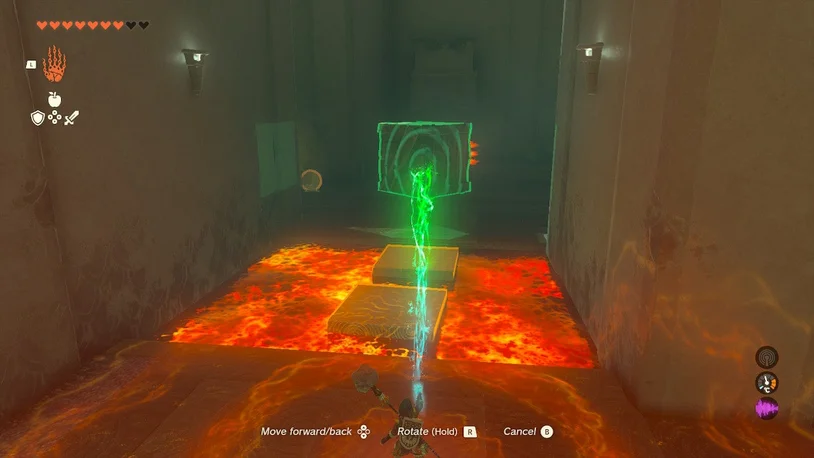
To enter the main area, move this cube across the lava.
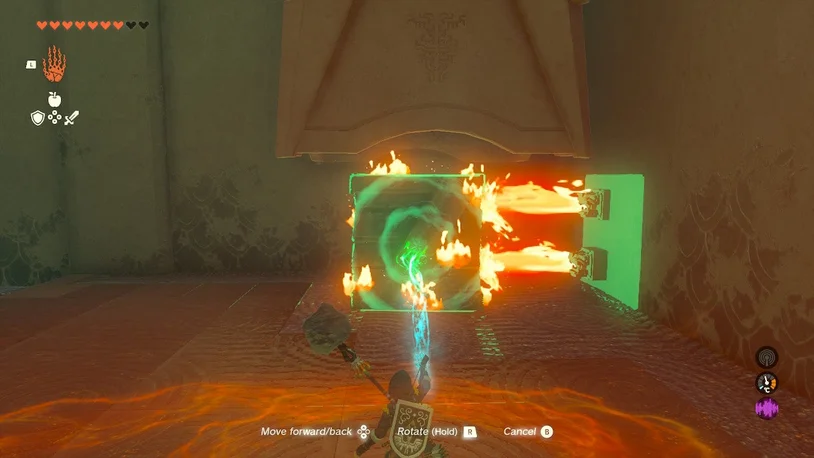
To get to the top ledge leading to the exit, the four cubes—two stone, one wooden, and one ice—must now be used, PLUS ASCEND. This puzzle is quite challenging!
Connect the two stone cubes vertically using Ultrahand. Create a step on the top of the stack by attaching the wooden cube to the edge of the stack’s top, halfway peeking up and over.
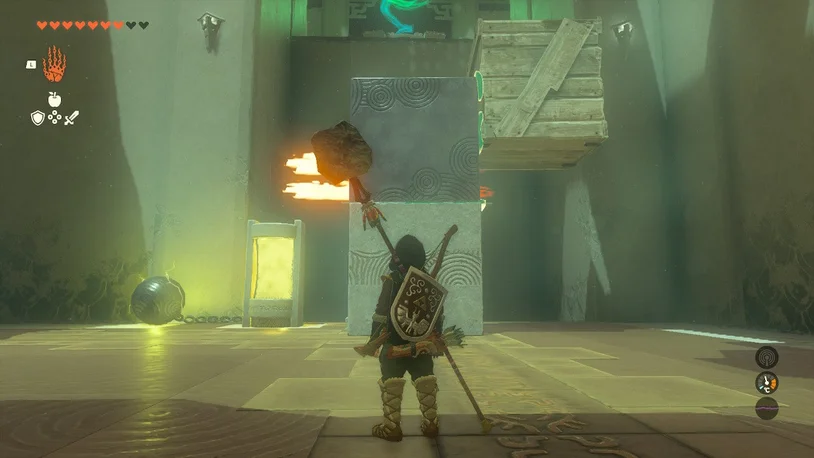
Lift the bottom of this stack to the platform with the fire using Ultrahand, being careful not to disturb the two stone cubes.

The wood cube will be about half a cube below and just high enough to reach the platform above, blocking the flames with the stone cubes.
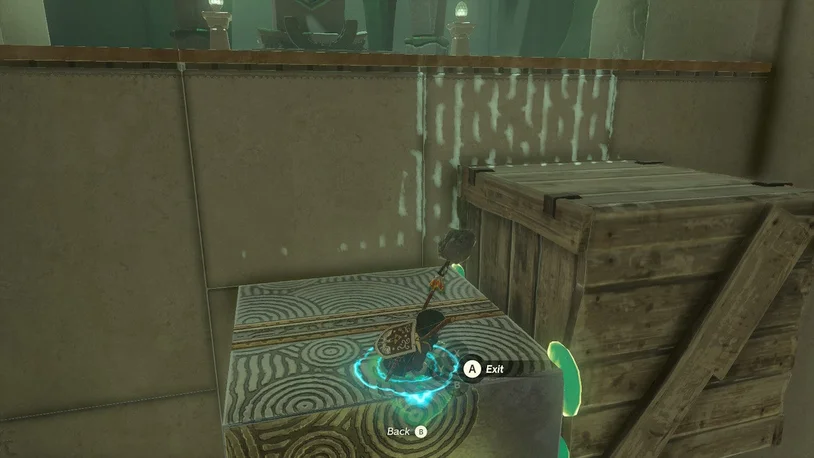
With Ascension, you can travel through the stone cubes, but you first need to crawl underneath them.
Place the ice cube beneath the stone cubes, then use Ascend to pass through the two stone cubes, emerge on top, leap onto the wood cube, and climb out the other side.
You’ve completed the shrine and obtained a Light of Blessing!