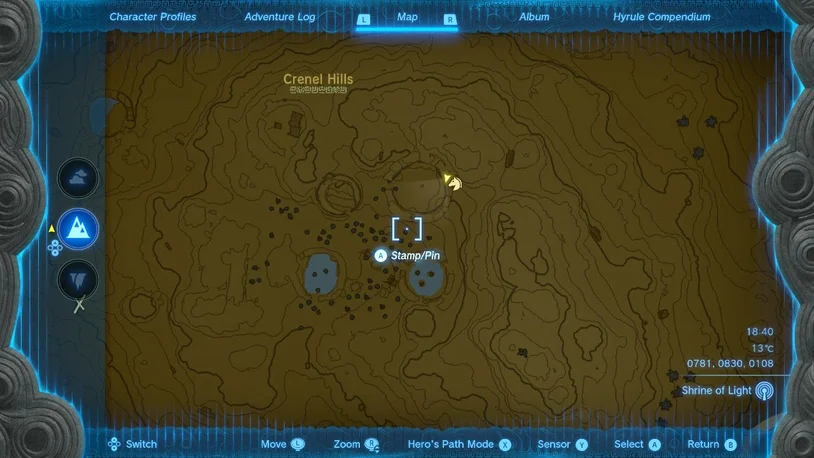
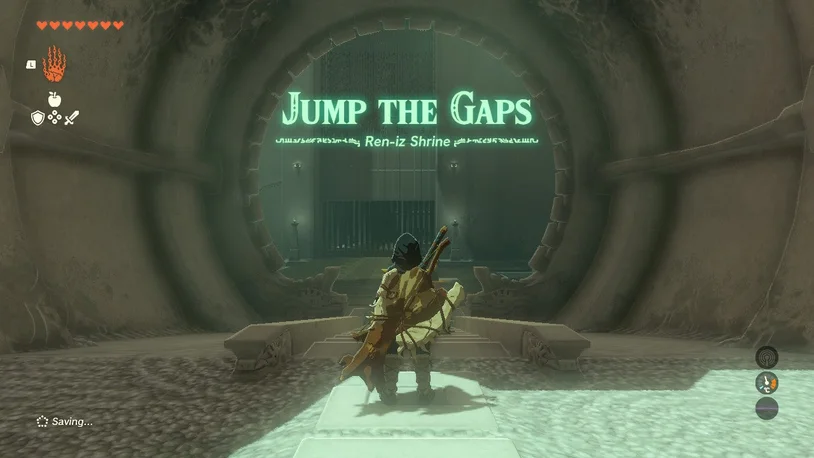
In The Legend of Zelda: Tears of the Kingdom, the Ren-iz Shrine (Jump the Gaps) is a shrine found in the Central Hyrule Region, notably in Hyrule Field’s Crenel Hills. This page includes directions for finding and entering the TotK Ren-iz shrine, a walkthrough through the shrine, answers to puzzles, and locations of hidden treasure chests.
Location and Access
Near the upper peaks of the Crenel Hills, you can find this shrine set inside the remnants of a huge tree that has been severely hacked out. To access this shrine, no special actions are required.
Walkthrough and Puzzle Solutions
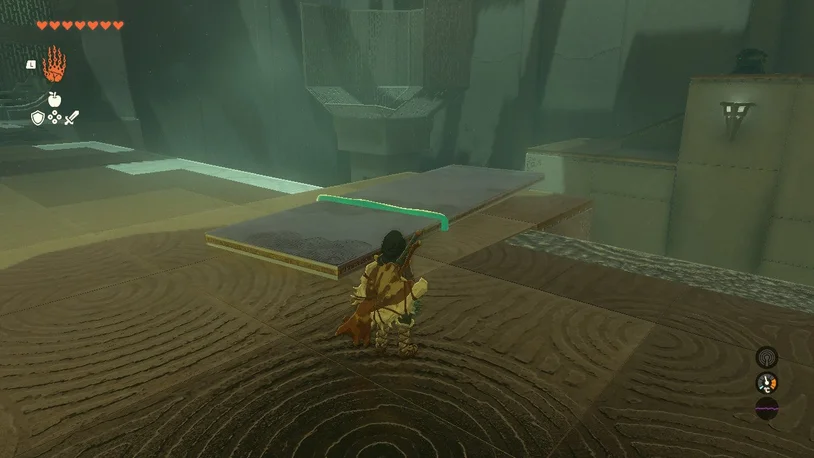
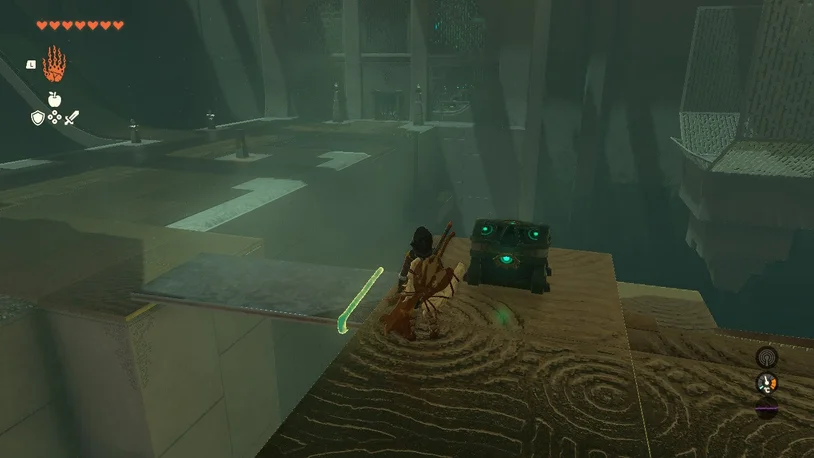
The first room serves as a quick angle test. The room has a sizable downsloping ramp to the left. A ball that needs to jump over the opening on the right and land in the basket is released when it strikes the glowing pillar. The metal plate that lies just past the glowing activation pillar on top of the raised wall can be used as a ramp by being raised with Ultrahand.

To ensure that the metal plate is securely in place, make sure it is on the white grate and not on the stone floor. then put it to the test! The metal plate may need to be positioned appropriately on the stone wall with its bottom resting on the metal grate or it may need to be shifted more towards the centre of the wall if it falls.
Location of the Treasure
Let’s take the riches before we tackle the task in the second room. Look to your right as you enter the following chamber. You can make out a solitary platform with a ramp heading up to a prize in the shadows. Utilise Ultrahand to grab the metal plate in the first room after returning there. A bridge could be built with it, but not quite. Don’t chuck it in the opening! (If you do, it’s ok; they’ll respawn. All you have to do is go get it again.)
Pull it back from the ledge and leave it alone. Use Ultrahand once more to seize a smaller square metal plate as you go towards the following pillar. You can now use it to cross to the platform of the chest by attaching it to your first plate. A Zonaite Shield is contained in the chest.
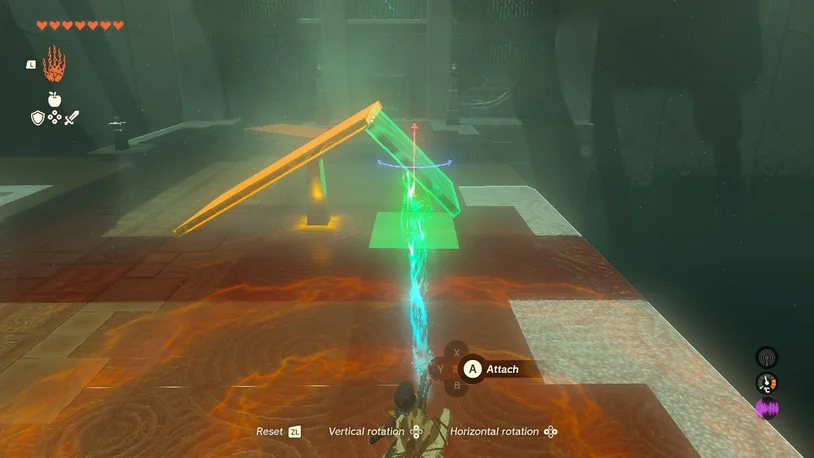
Returning to the puzzle, the second room is very similar to the first, with the exception that you don’t have a helpful wall to use as a ramp. You only need the short square one and one of the long metal pieces in this situation.
The illuminating pillar can be used as a platform for one of the long metal plates, which is then pushed up. Make sure you are not in the ball’s route because that will activate the pillar.

The rotation option should then be selected when using Ultrahand on the short metal plate. To create the angle shown below, first angle the edges of the longer and shorter platforms by pressing up on the vertical alignment once to get it at an angle.
Now that you have your ramp, use Ultrahand to position it in the indented ramp spot. Be sure your new ramp is flush with the upper floor point to ensure that the ball won’t have any room to slow down. You may now solve the shrine by letting the ball go!
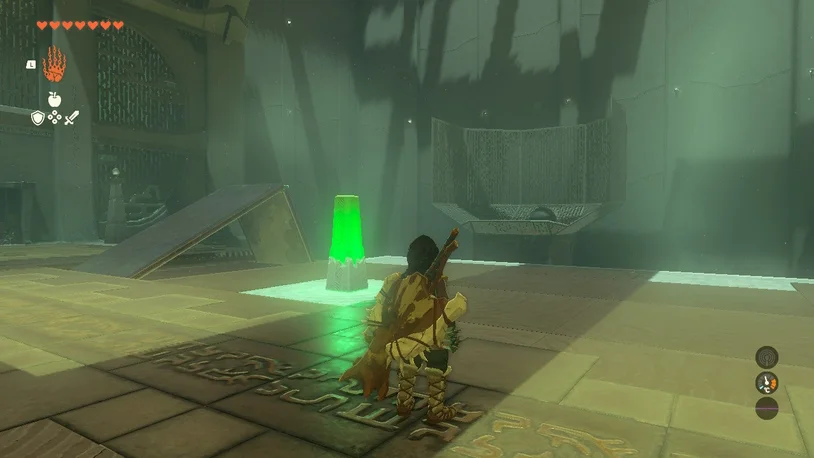
Enter the next room, take a Light of Blessing, and then leave.
You’ve completed the shrine and obtained a Light of Blessing!