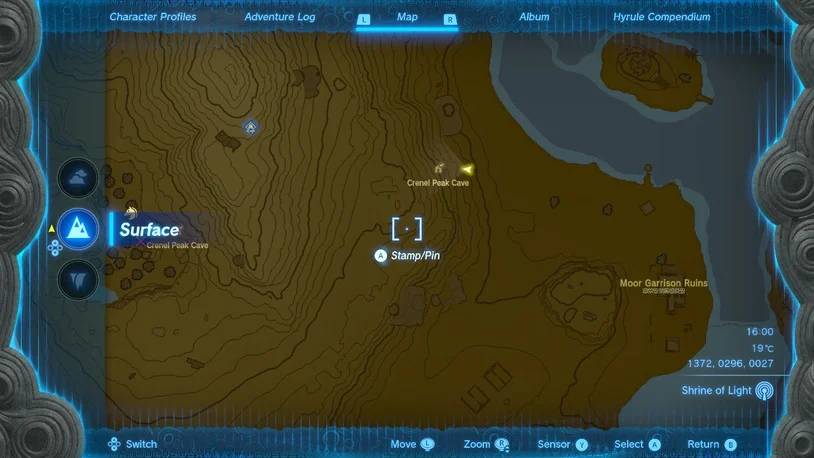
In The Legend of Zelda: Tears of the Kingdom, one of numerous Central Hyrule shrines is Jojon Shrine (Proving Grounds: Rotation), located in Hyrule Field’s Crenel Peak. A network of caves beneath the hill conceals the entrance to this shrine. Use this guide to learn about the difficulties you will face and be sure to take the simple route to the shrine.
Finding Crenel Peak Shrine
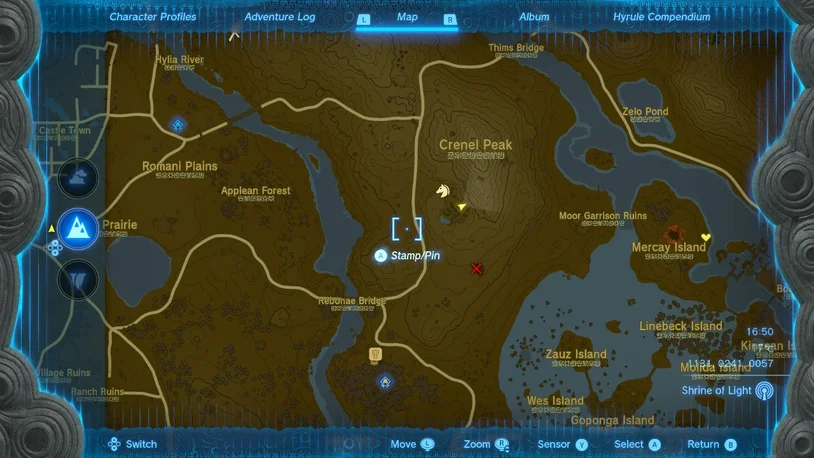
This temple has two entrances, one of which is considerably simpler than the other. For the simple one, head towards the Moor Garrison Ruins (southeast of Crenel Peak), and you’ll find the entrance to Crenel Peak Cave slightly north of them on Crenel Peak’s slope.
Enter the room and battle the Blue Horriblin after swimming past the pod housing a bright cavefish. To easily kill it, use arrows to knock it off the ceiling. Once it is dead, you can either work through the rock wall on the left to discover a Bubbulfrog or demolish the rock wall on the right for a shorter path to the shrine. You’ll have to cross more water if you continue straight. You can reach the Jojon Shrine if you keep destroying the rock walls straight ahead.
Approaching Crenel Peak Shrine from the west
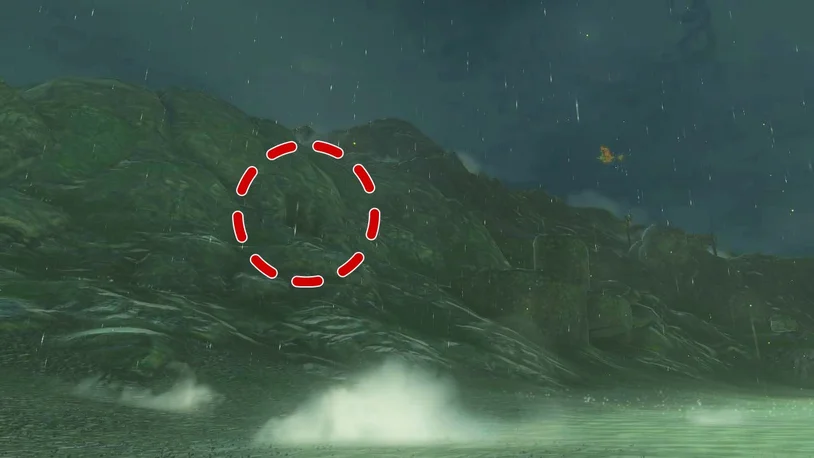
Although the west entrance to Crenel Peak Cave presents a greater resource and battle challenge, it is also simpler to locate because it is close to the road.
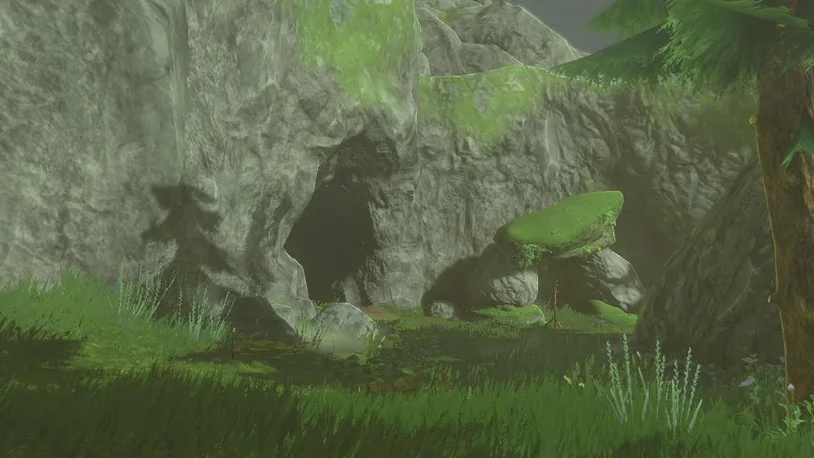
This cave’s entrance is located in an inlet that is covered in Armoranth. Both the enemies and the cave’s entrance are obvious from a distance. A Bomb Flower may be seen near the cave’s entrance.

Three regular Blue Bokoblin are observing a meat roast while a Blue Boss Bokoblin lounges on the right side of the cave. If you have a Muddle Bud with you, you can use it on the Boss Bokoblin to have it attack its allies to start the battle. Though it won’t last long. Any Bokoblin that is still standing should be destroyed with the Bomb Flower that you discovered at the cave’s entrance. If you’re not quite ready to rush all of the Bokoblin, you can cause mayhem by using your arrows together with whatever else is in your backpack.
Once every Bokoblin has been eliminated, enter the tiny cave to gather the objects scattered across it. To the right of the fire pit is a typical treasure chest. To find five additional Bomb Flowers, open it.
Hanging vines are located just past the mining deposits and Brightbloom Seeds. You’ll need to use a blade to cut them down or start a fire to go past them.
If you don’t have a blade on hand, you can swing a wooden weapon or one of the Bokoblin’s wooden weapons in the fire pit to construct an improvised torch. After that, approach the vines directly. The vines don’t catch fire when you hit them; you merely need to allow them to do so through proximity. If you back up, you can see them on fire. If not, change your position so that the fire touches the vines.

You can enter the deeper cave beyond once the vines are cut. If you can catch one or two sticky lizards, take them. We advise utilising a Rusty Claymore fused with any of the nearby boulders rather than your bombs to destroy the rock wall beyond. Boss Bokoblin ought to have already dropped a Rusty Claymore. If you don’t see one, use bombs to blow up the first and second rock walls, and a Rusty Claymore should fall. After the fourth set of walls, two paths diverge, so use the fusion to demolish them.
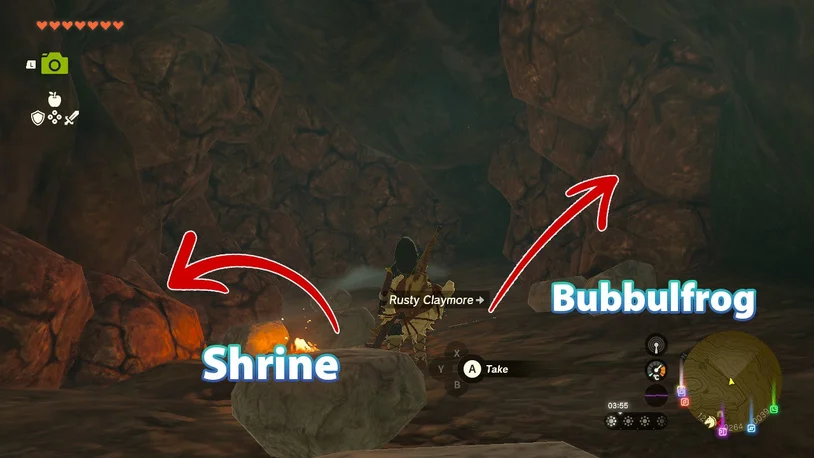
The following stretch of the walkway on the right needs two bombs to pass through and is not towards the shrine (if you face it, the beeping will cease). However, a Bubbulfrog can be found immediately beyond. If you choose to keep going in this manner, take it out to receive a unique prize before moving on to the next rock wall.
Below is further information about what is coming up:
There are various rock strata to navigate through here. Destroy the first path on the split right and the first path on the left to release a couple of additional rusted claymores for your usage. Then Blue Horriblin will be in close quarters with you. To make fighting it simpler, use arrows to bring it down.
After the wall is removed, the road splits once more to the left. It’s optional to take the right path that veers into the ocean. If you haven’t previously worked out how to destroy it, it’s preferable to ignore that rather than wasting bombs on it (it’s a cave hall that loops from the road on the right).
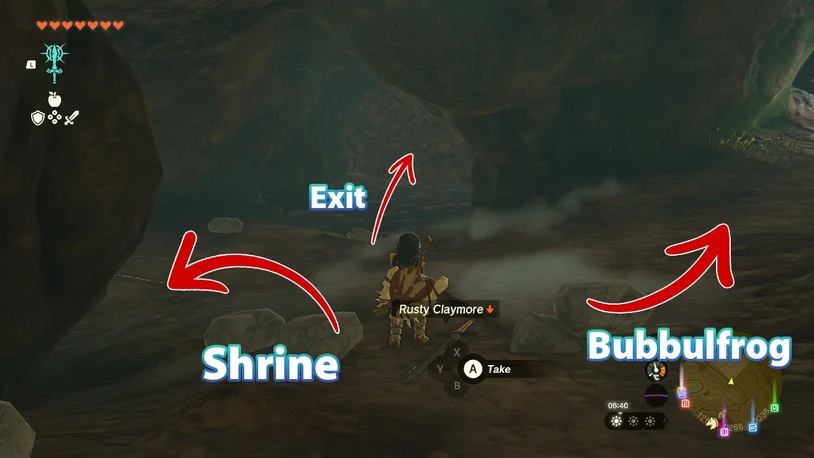
The leftmost path is home to a few more sticky lizards, Giant Brightbloom Seed, Luminous Stone, Brightcap mushrooms, and finally the Crenel Peak Shrine, Jojon Shrine.
Jojon Shrine Guide and Puzzle Answers
You have been given another Proving Grounds task by Jojon Shrine, which entails that all supplies, tools, and food are gone but will be replaced after you’ve destroyed every Construct.
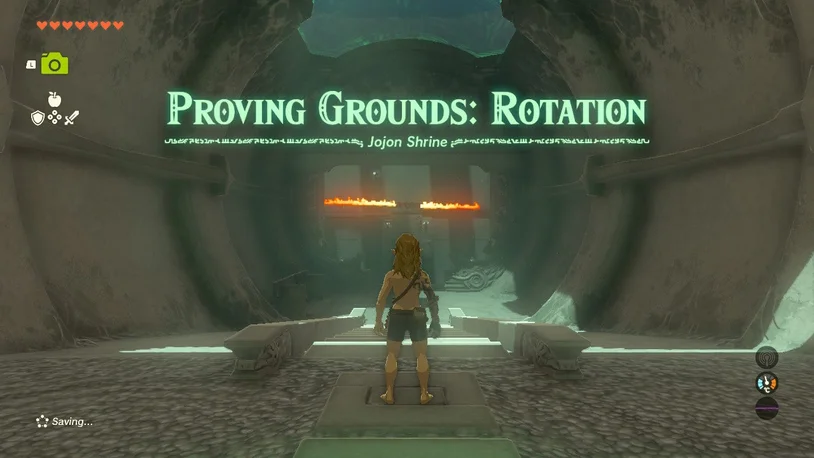
Proving Grounds: Rotation is this one. You should gather the sparse collection of weapons (a thin stick, a wooden stick, and an old wooden shield) to use against the few constructs that wander the shrine, which is located to the left of the entry road. Be careful because if you warn them, they’ll start shooting at you.
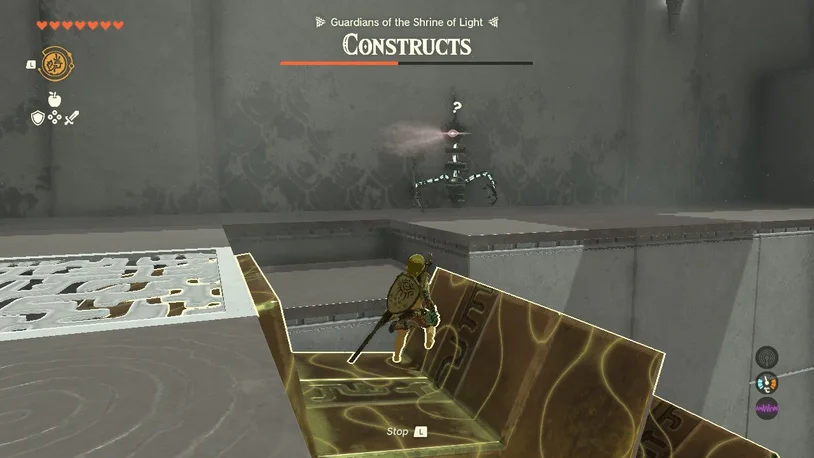
To get the Zonai Soldier Construct out of the way, carefully move to the first turning gear and cross over there. Although it is an alternative, it possesses a rusted Halberd that is more helpful than your wooden stick. Return to the first gear, then move across to the following one to face a different Construct. It might lose its bow, but that’s all right. Run over to the right platform and throw the flame emitter tower into the trash using Ultrahand.

Two explosive barrels and two Rusty Halberd may be found in the area just beyond it as you make your way towards the entrance. If you possess a Rusty Broadsword, think about joining it with the Rusty Halberd. You ought to take up the Construct below if you haven’t already.
You can locate a Construct with a Zonaite Shield and a Rusty Broadsword below the rotating cogs. Again, the Wooden-Stick Stick’s improved attack and weapon typing come in help. Just watch out for the second structure down here with flame emitters. The Construct Bow, arrows, a second Rusty Broadsword, and Bomb Flowers are all in a different corner. To climb back up, use Ascend underneath the cogs. The Zonai Spring is an additional option.
Make your way to the right platform with the Halberds and explosive barrels to access the second floor. Turn the revolving cog into a personal lift by using Recall on it. Once you reach the top, though, be prepared to engage in combat.
The soldier in front of you is carrying fire arrows. Once it’s resolved, you’re in some degree of safety. Grab the bow and arrows, and make sure your best bow is ready. The final Construct is on the right side of the chamber, to the right of the spinning fire that you can mostly ignore.
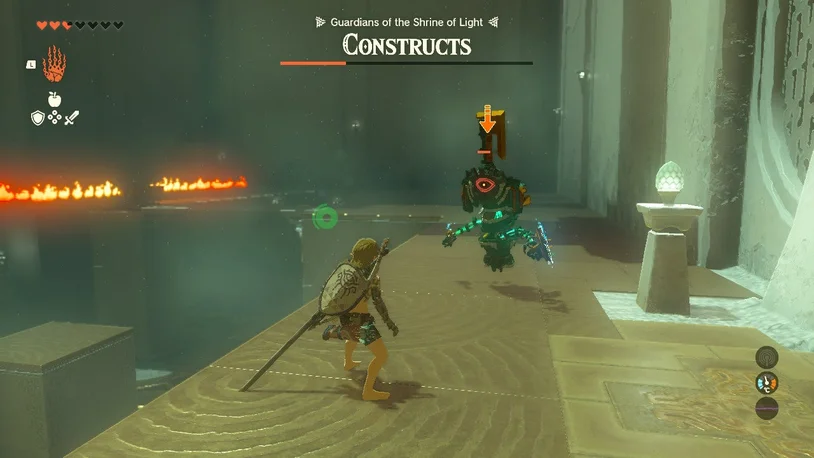
The easiest way to combat this one is to arrow it from a distance. Try to get those before it raises its shield because a hit to the eye will stun it! This Soldier Construct is the kind that spins violently for a brief period and can cause a great deal of harm if you are not careful. You can pick it off from a distance if you use a heavier weapon to knock it to a lower floor. Otherwise, maintain focus and avoid its assaults. Your belongings are returned and the exit door unlocks once the last Construct has been destroyed.
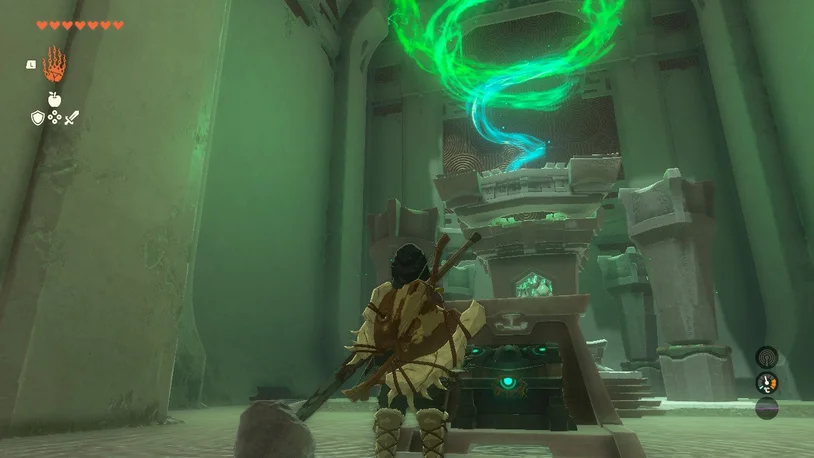
The shrine’s treasure chest with a Magic Rod is in the room beyond. Receive your Light of Blessing and a quick boot out of the shrine by ascending the stairs.